X-A1 vs. X-M1: Photo Ninja Edition
Talk to Rico (open forum for questions & feedback) – Rico’s Flickr sets – X-A1 sample images set – X-M1 sample images set – X-M1 vs. X-A1 shooutout set (private Flickr set, MUST use this link!) – Original X-A1 & X-M1 shootout RAW files for download – Mastering the Fujifilm X-Pro1 reading samples (65 free pages) – Pre-order my very soon to be released NEW book: Mastering the Fujifilm X-E1 and X-Pro1
As expected, my little X-A1/X-M1 shootout has created some controversy over the weekend, at least among the pixel peeping crowd. Since neither the built-in RAW converters nor Adobe Lightroom are perfect choices for extracting maximum detail from a RAW file, it may be interesting to run our samples through alternative converters. Unfortunately, there’s still little RAW support for the X-A1, but Jim Christian of PictureCode was kind enough to create a special version of his widely discussed Photo Ninja converter.
Photo Ninja is a very interesting multi-platform RAW converter with powerful (and very smart) adaptive lighting, great noise reduction and, in its latest incarnation, preliminary X-Trans sensor support. Unlike Lightroom, Photo Ninja allows you to completely turn off luminance noise reduction, which is great for comparing different cameras and their sensors.
Photo Ninja Shootout Samples
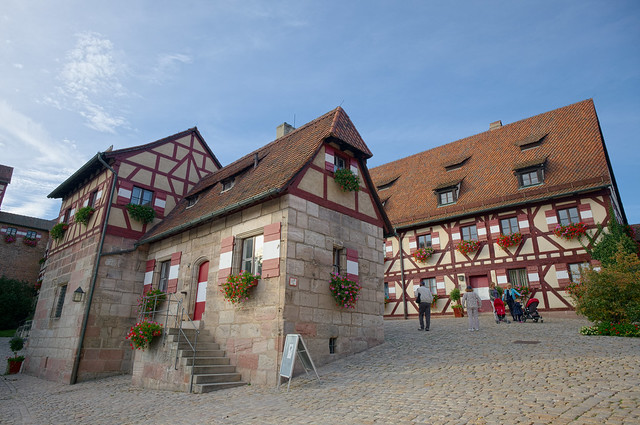
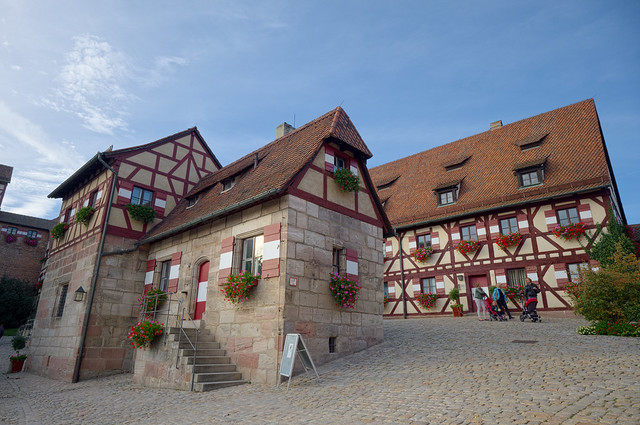
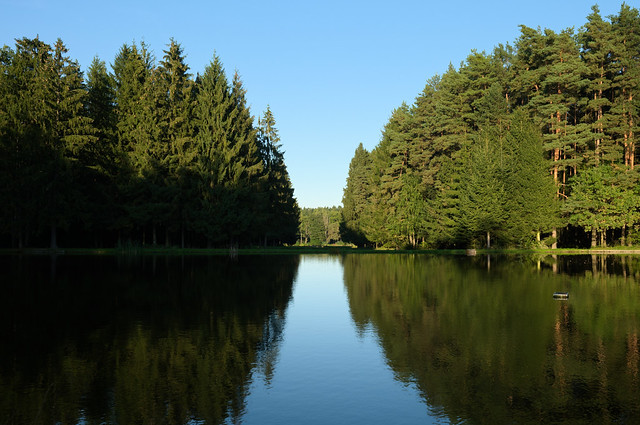
Here’s our first image, rendered with Photo Ninja:
Unlike Lightroom and the built-in RAW converter, Photo Ninja displays more and better fine detail in the X-M1 sample:

X-M1 (left) vs. X-A1 (right) – Photo Ninja 1.2.1 – click on the image for a 100% view
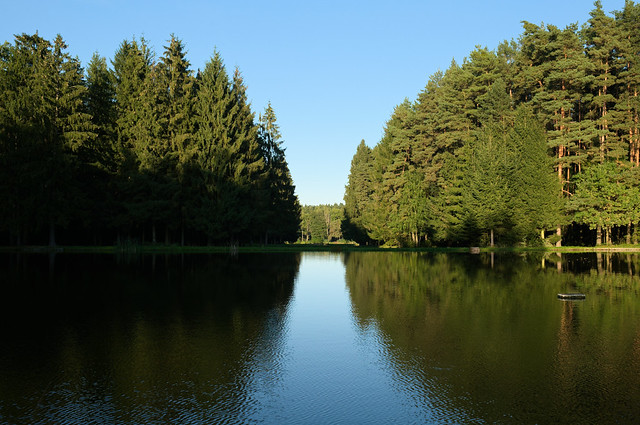
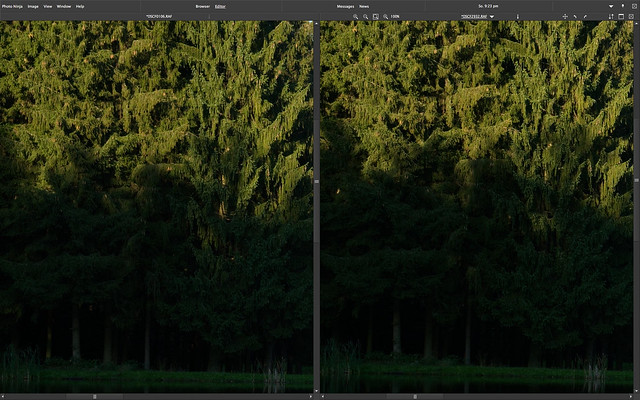
The “detail advantage” (which is to be expected due the missing AA filter on the X-Trans sensor) is even more pronounced in our second sample, featuring plenty of foliage:
Again, let’s have a look at selected 100% crops:
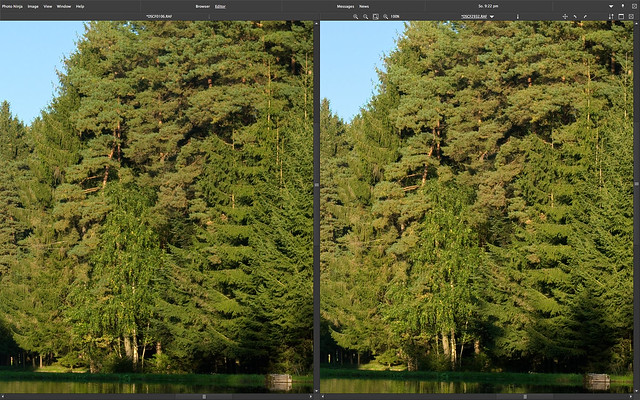
X-A1 (left) vs. X-M1 (right) – Photo Ninja 1.2.1 – click on the image for a 100% view
X-A1 (left) vs. X-M1 (right) – Photo Ninja 1.2.1 – click on the image for a 100% view
It is hard to miss the relative softness and reduced fine detail definition of the X-A1 Bayer camera in this direct comparison.
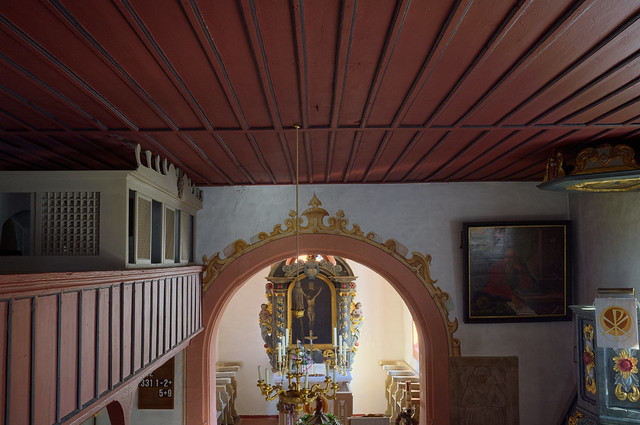
Finally, let’s look at our high-ISO sample and render the ISO 800 and ISO 6400 shots in Photo Ninja, once again without applying any luminance noise reduction. Here’s the ISO 800 version:
Let’s take a closer look at the wall painting:
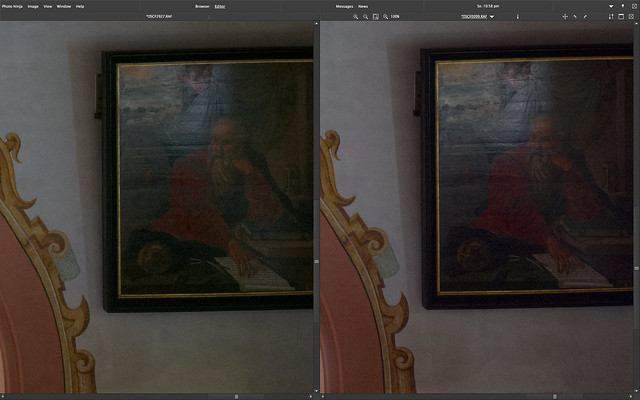
X-M1 (left) vs. X-A1 (right) – Photo Ninja 1.2.1 – click on the image for a 100% view
There’s a visible difference in how the different sensors handle noise. Or let’s better say: There’s a difference in how Photo Ninja extracts noise from different sensor CFAs. In the end, all these comparisons are never just about different cameras, they are always about the cameras in combination with a specific RAW converter and its demosaicing algorithms.
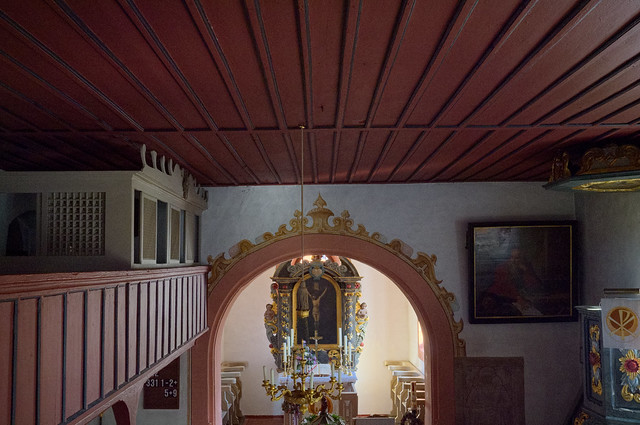
The “noise difference” becomes even clearer at ISO 6400:
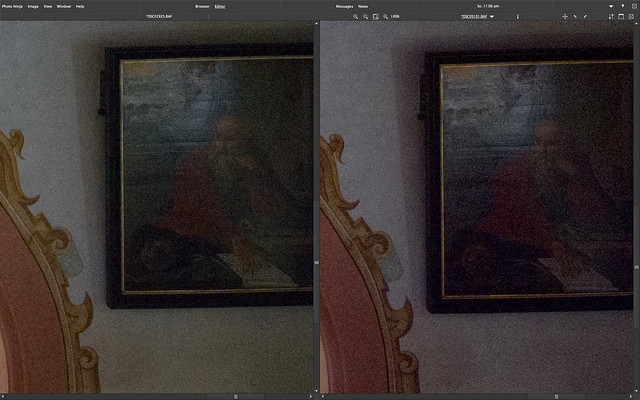
X-M1 (left) vs. X-A1 (right) – Photo Ninja 1.2.1 – click on the image for a 100% view
There isn’t much difference in the amount of noise, but to my eye, the X-M1 image noise looks crisper (remember, there’s no luminance noise reduction in both images) and a bit more refined.
Click here to access my Flickr set, where you can view and download full-size versions of all shootout samples. As soon as PictureCode releases a Photo Ninja version with official X-A1 RAW support, you will be able to conduct your own comparisons using the development parameters of your choice.
Photo Ninja Workflow Integration
Users of Photomechanic, Photoshop, Lightroom or Aperture can integrate Photo Ninja into their existing workflow. Click here and scroll way down for tutorials on this subject. There’s also a brand-new article by my colleague Uwe Steinmüller on integrating Photo Ninja with Lightroom: Click here to read it on his website.
What’s next?
Photo Ninja is a very interesting RAW converter, and its makers seem to be dedicated to the Fuji crowd. Hopefully, future version will support the highlight recovery feature and automatic lens corrections based on RAW metadata (distortion, vignetting, CAs and possibly LMO data). Maybe, if we ask nicely, PictureCode will also include replicas of Fuji’s built-in color film simulations (Provia, Velvia, Astia, Pro Neg. Hi and Pro Neg. Std). If you are interested in such features, please make yourself heard in the comment section.
Fujifilm X-A1 in stock check
USA: AmazonUS (black in stock)/ eBay / BHphoto (blue in stock)/ Adorama (black in stock)/ Pictureline / DigitalRev EUROPE: AmazonUK (via DR) DigitalRev / eBay
Fujifilm X-M1
USA: AmazonUS (save $72 on the silver version + kit lens) / BHphoto / Adorama / Pictureline / [shoplink 17242 ebay]eBay[/shoplink] ($70 price drop) / DigitalRev EUROPE: eBay / DigitalRev / AmazonDE (via DR) / wexcamerasDE / AmazonUK (via DR) / PCHstore
For your convenience, here’s a TOC with links to my previous X-PERT CORNER articles:
- X-A1 vs. X-M1: the Shootout
- Using the Fujifilm X-A1 [& X-M1]
- First Look: Fujinon XF23mmF1.4 R
- RAW Converter Shootout Results
- Ultimate RAW Converter Shootout
- First Look: X-M1 with New Kit Zoom and Pancake Lens
- Zeiss Touit vs. Fujinon XF
- Remote Shutter Control for X Series Cameras
- Apple Camera RAW, X-Trans and EXR
- First Look: XF55-200mmF3.5-4.8 R LM OIS
- Studio X
- Using the X100S
- Using the X20
- X100S vs. X100
- X20 vs. X10
- RAW, JPEG, Silkypix and “Fuji Colors”
- Adapting Third-Party Lenses (updated with Speed Booster)
- RAW for JPEG Shooters…
- Tips for Updating your Firmware
- How to Clean the X-Trans Sensor
- Using the XF14mmF2.8 R
- Decoding XF18-55mmF2.8-4 R LM OIS
- Comparing RAW converters: JPEG vs. Lightroom, Capture One, Silkypix & RPP
- XF14mmF2.8 R appears to be almost distortion free
- How to Expand Dynamic Range
- How to Use Extended ISO
- EXR, anyone?
- Capture One – When the Going Gets Tough…
- Using Shooting Profiles and the Quick Menu
Rico Pfirstinger studied communications and has been working as journalist, publicist, and photographer since the mid-80s. He has written a number of books on topics as diverse as Adobe PageMaker and sled dogs, and produced a beautiful book of photographs titled Huskies in Action (German version). He has spent time working as the head of a department with the German Burda-Publishing Company and served as chief editor for a winter sports website. After eight years as a freelance film critic and entertainment writer in Los Angeles, Rico now lives in Germany and devotes his time to digital photography and compact camera systems. His book “Mastering the FUJIFILM X-Pro1” (Kindle Edition) (Apple iBook Store) (German version) is available on Amazon and offers a plethora of tips, secrets and background information on successfully using Fuji’s X-Pro1 and X-E1 system cameras, lenses and key accessories.


