Exposing Right

dealExposing Right

by Rico Pfirstinger

Talk to Rico (open forum for questions & feedback)Rico’s Flickr sets – Expanded XQ1 Sample Images Set – Expanded X-E2 Sample Images Set – X-E2 AF tracking samples – Mastering the Fujifilm X-Pro1 reading samples (65 free pages) – Get my NEW book (print or DRM-free eBook/PDF): Mastering the Fujifilm X-E1 and X-Pro1 (use code FUJIRUMORS to save 35%!)

DSCF0748 – Lightroom 5.3

Welcome to the X-Pert Corner Holiday Edition!

‘Tis the season of festive lights and crazy contrasts. Your X-series camera can master these challenging situations—but can you master your X-series camera? ;)

No worries! We are going to have a look at how Fuji’s latest firmware update can make your life easier, and we will also look into the DR expansion function of your camera. However, let’s start with the basics: ETTR, or “Expose To The Right”.

ETTR – “Expose To The Right”

ETTR is often misunderstood as “overexposing” an image, then correcting the exposure by “pulling the brightness back down” in an external RAW converter like Adobe Lightroom.

Well, that’s the theory. In reality, ETTR often means to perform quite the opposite: to underexpose an image in order to save important highlights from clipping, then “pushing” the shadows and midtones back up in an external RAW converter. You can read more about the background story of this method in my books, so let’s focus on the practical side of things.

DSCF1422 – Lightroom 5.3RC

Per definition, ETTR is best-suited for RAW-only shooters: They set the camera to DR100% and use the live histogram to settle with an exposure that won’t clip important highlights. All X-series photographers can use this method in P, A and S exposure modes. However, in order to also use it in M (manual exposure) mode, you need either an X-E2 or XQ1, or an X-E1, X-Pro1 or X100S with the latest 18DEC firmware update. Manual mode shooters should make sure that SETUP MENU > SCREEN SET-UP > PREVIEW EXP. IN MANUAL MODE is set to ON. This setting enables the WYSIWYG live view and the live histogram in manual exposure mode.

That said, here’s a quick ETTR example:

** CLICK HERE to Read the Rest of the Article **

Using Auto-ISO

Using Auto-ISO

by Rico Pfirstinger

Talk to Rico (open forum for questions & feedback)Rico’s Flickr sets – Expanded XQ1 Sample Images Set – Expanded X-E2 Sample Images Set (includes full-size SOOC JPEG and RAW samples) – X-E2 AF tracking samples – Mastering the Fujifilm X-Pro1 reading samples (65 free pages) – Order my NEW book (print or DRM-free eBook/PDF): Mastering the Fujifilm X-E1 and X-Pro1 (use code FUJISAVES30 to save 30%!)

Thanks to continuous firmware updates, all Fujifilm X-Mount cameras will eventually use the same Auto-ISO paradigm. This “new” feature is actually based on the original custom Auto-ISO function in the classic X100. Since the Auto-ISO section in my book Mastering the Fujifilm X-E1 and X-Pro1 is still describing the previous (and not so popular) Auto-ISO version, this X-Pert Corner column also serves as a free update for my loyal readers.

Auto-ISO Parameters

How do you make the most out of the improved Auto-ISO feature? First, let’s see how it works:

Instead of automatically using a minimum shutter speed (MSS) based on the focal length (FL) setting of your lens, the new Auto-ISO lets you choose and set any MSS between 1/4s and 1/500s (or 1/125s in the X-A1 and X-M1). That’s quite a range! For the record: The MSS formula for the previous Auto-ISO version used to be MSS = 1 / [FL x 1.5], with exceptions for very long lenses and lenses and active image stabilization.

In addition to setting your own minimum shutter speed, you can now also set the default sensitivity and the maximum sensitivity. These two sensitivity parameters define your Auto-ISO range: The camera will never pick an ISO setting that is lower than the default sensitivity, and it will never exceed the maximum sensitivity setting. Within these limits, it will always try to meet the set minimum shutter speed requirements, and in order to do so, it will automatically increase the ISO value.

Auto-ISO and Exposure Modes

How does Auto-ISO work in concert with your camera’s four PASM exposure modes? Let’s have a look:

** CLICK HERE to Read the Rest of the Article **

Using Face Detection

Using Face Detection

by Rico Pfirstinger

Talk to Rico (open forum for questions & feedback)Rico’s Flickr sets – Expanded XQ1 Sample Images Set – Expanded X-E2 Sample Images Set – X-E2 AF tracking samples – Mastering the Fujifilm X-Pro1 reading samples (65 free pages) – Order my NEW book (print or DRM-free eBook/PDF): Mastering the Fujifilm X-E1 and X-Pro1 (use code FUJISAVES30 to save 30%!)

Fujifilm kindly delivered the LMO and PDAF upgrades for most of the X-Mount lenses a day earlier than expected, and they have also fixed the manual focus glitch in firmware 2.00 for the classic X100. I am looking forward to read about your first impressions with the X-E2 (and XQ1) using the new hybrid tracking autofocus.

If you need assistance upgrading your camera or lens firmware, you might find this article helpful. Sadly, there’s still no word if or when Zeiss will issue similar firmware updates for their X-Mount Touit lenses.

In Your Face!

Face Detection has always been available in most of Fujifilm’s “consumer” cameras. Among others, you can find this feature in the X10, X-S1, X20, XF1 and XQ1, and now also in the X-A1, X-M1 and X-E2. Face Detection is also available in combination with the tracking autofocus feature of the XQ1 and X-E2. This means that you can use Face Detection along with AF-C (in either single shot or low-speed burst mode) to keep the face of a person in focus while this person is moving left or right, or towards or away the camera.

While the hybrid PDAF/CDAF (combining on-sensor Phase Detection Auto Focus with on-sensor Contrast Detection Auto Focus) allows the camera to focus faster on a subject, Face Detection has to rely mostly (if not entirely) on the camera’s CDAF, because in many real-life situations, the face the camera is locking on will not be fully located inside of the nine central AF frames (the area that is equipped with PDAF pixels).

PDAF helps the camera establish and lock focus faster, but it’s not mandatory to enable autofocus tracking. Just think of the Olympus OM-D EM-5, which doesn’t have PDAF, but still offers fast AF and subject tracking capabilities. Your X-E2 and XQ1 can do this, too: Both cameras can track subjects with any of their 49 AF frames, not just the nine central ones (aka those with PDAF pixels).

In addition to selecting one of the camera’s 49 AF frames, you can also set the X-E2 and XQ1 to track subjects using Face Detection. Click here to access a private Flickr set that illustrates both standard AF tracking (pre-production 23mm lens) and Face Detection AF tracking (pre-production 50-230mm lens) with a pre-production X-E2.

Wait, There’s More!

While most users will immediately understand how Face Detection and the camera’s autofocus work hand-in-hand, some may not realize that Face Detection also influences the exposure metering of the camera. To illustrate this, let’s have a look at an example.

** CLICK HERE to Read the Rest of the Article **

First Look: Fujifilm XQ1

 photo Xq1_zpsd9d44566.jpg

First Look: Fujifilm XQ1

by Rico Pfirstinger

Talk to Rico (open forum for questions & feedback)Rico’s Flickr sets – XQ1 Sample Images Set – Expanded X-E2 Sample Images Set –  Mastering the Fujifilm X-Pro1 reading samples (65 free pages) – Order my NEW book (print or DRM-free eBook/PDF): Mastering the Fujifilm X-E1 and X-Pro1 (use code FUJISAVES30 to save 30%!)

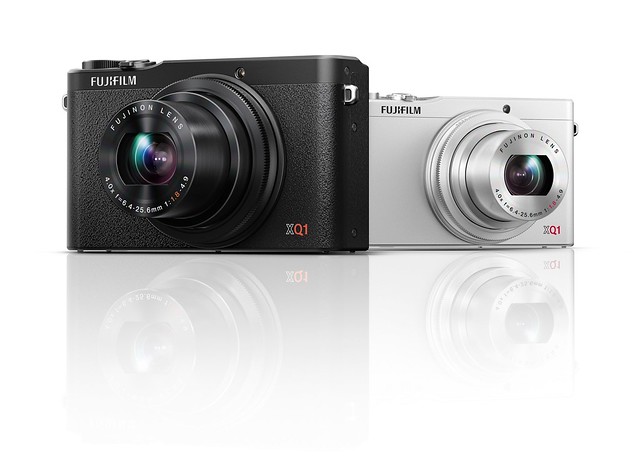
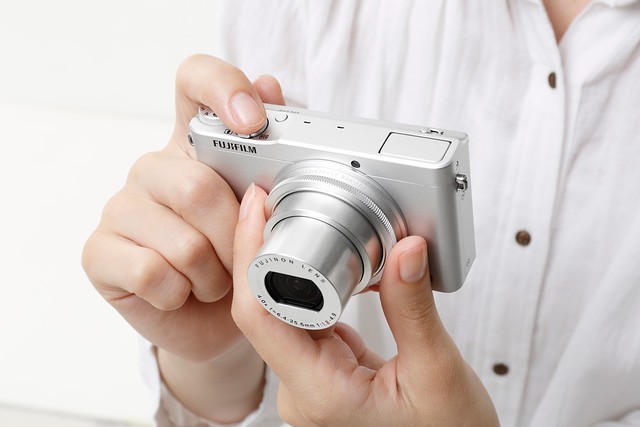
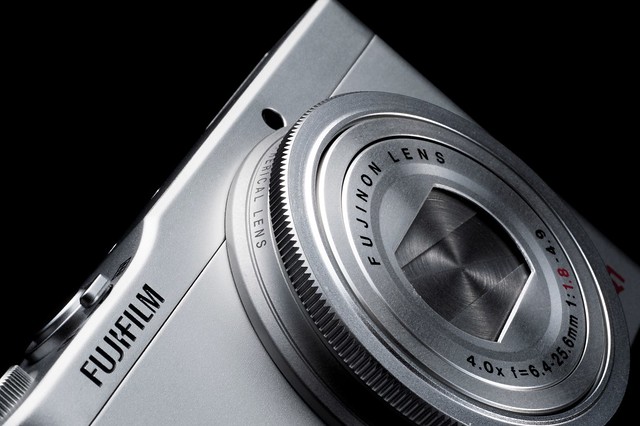
Size does matter: Succeeding the stylish Fujifilm XF1 point&shoot camera, the full-metal XQ1 is even smaller and more lightweight than its already very pocketable predecessor. Solidly built, the XQ1 comes in either black or silver, and it features the same 2/3″ X-Trans sensor as in Fuji’s bulkier and more retro-styled X20 compact camera.

Exterior

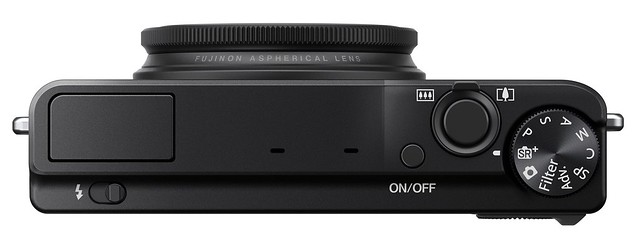
Since many customers took issue with the manual zoom mechanism of the XF1 (and its unconventional on/off switch), Fuji equipped the XQ1 with a more conventional electronic “fly-by-wire” zoom and a standard on/off button.

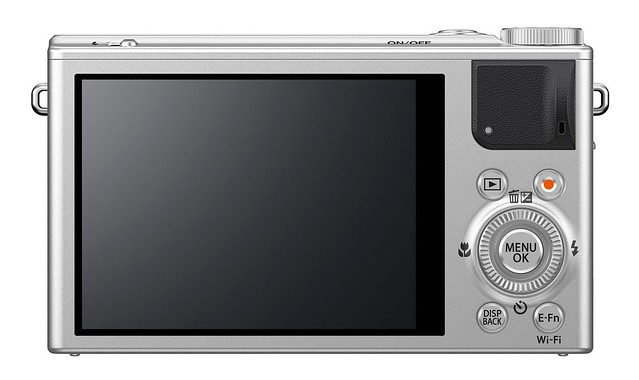
The manual zoom ring has been replaced with a multifunctional “lens control ring” that can serve many different purposes. One of them, of course, is zooming the lens, so those of you who actually like to zoom in and out the “old fashioned” way can do so by setting the lens control ring to serve as a zoom ring.

In its “smart” standard setting, the control ring will assume different functions depending on which mode the camera is operating in. For example, in P exposure mode, the control ring handles the exposure shift. In aperture priority mode, you can use it to set the aperture. If you want to manually set the control ring function, you have a choice of controlling either exposure, ISO, white balance, film simulations, drive mode or zooming. In its default “smart” setting, the control ring offers even more variety, like picking an effect when in the Advanced Filter mode, or choosing a scene mode when the camera is set to Scene Position (SP).

Like in the XF1, six of the nine buttons on the back of the XQ1 have a second function layer that can be user customized. This basically gives you six different function buttons that can control any of the following features: face detection, intelligent digital zoom, ISO, image size, image quality, dynamic range, film simulation, white balance, drive mode, photometry (exposure measurement mode), AF mode, focus mode, focus area or wifi. To access this second button layer, simply press the E-Fn button.

A notable change is the camera’s new NP-48 battery, which is smaller (but not less powerful) than the NP-50A batteries previously used in the X10, X20 and XF1. The battery can be charged inside the XQ1 with a simple USB connection. The camera comes with a power supply and USB cable, but you can just as well use any existing USB (aka smartphone) charger. You can also use the supplied cable to connect the camera to the USB port of your laptop, or any car/airplane charger with a USB outlet. So if you travel with your smartphone or laptop, chances are you can save weight and space because you don’t have to bring an extra charger or power supply specifically for your XQ1. Of course, those who prefer to charge their batteries outside the camera can always purchase an external Fujifilm or third-party charger.

** CLICK HERE to Read the Rest of the Article **

PDAF & LMO Lens Firmware Updates Coming in November


_ _ _

by Rico Pfirstinger

Talk to Rico (open forum for questions & feedback)Rico’s Flickr sets – X-E2 Sample Images SetX-E2 Tracking AF Samples (private set, must use this link) – X-E2 Lens Modulation Optimizer (LMO) Examples (private set, must use this link) – XQ1 Sample Images Set – Mastering the Fujifilm X-Pro1 reading samples (65 free pages) – Order my NEW book (print or DRM-free eBook/PDF): Mastering the Fujifilm X-E1 and X-Pro1 (use code FUJISAVES30 to save 30%!)

Good news from Tokyo: Fujifilm has been expediting  their efforts to provide lens firmware updates in order to fully support the new X-E2 with its PDAF/CDAF hybrid autofocus system and lens modulation optimizer. Click here to learn more about these features and read my First Look on the X-E2.

Here’s the plan:

On November 7, Fuji hopes to roll out PDAF and LMO firmware updates to the following lenses:

  • XF14mmF2,8 R (V. 3.10)
  • XF35mmF1.4 R (V. 3.10)
  • XF60mmF2.4 R Macro (V. 3.10)
  • XF18-55mmF2.8-4 R LM OIS (V. 3.10)
  • XF55-200mmF3.5-4.8 R LM OIS (V. 3.10)
  • XC16-50mmF3.5-5.6 OIS (V. 1.10, PDAF update only, no LMO support)

By the end of November, Fuji plans to offer updates to the remaining XF lenses:

  • XF18mmF2 R (V. 3.10)
  • XF27mmF2.8 (V. 1.10)

The XF23mmF1.4 R supports PDAF and LMO out of the box with firmware 1.00, so no update is required.

The new XC50-230mmF4.5-6.7 OIS supports PDAF out of the box, too (firmware 1.00). However, there will be no LMO support for XC lenses.

X-E2 kits sold with the XF18-55mmF2.8-4 R LM OIS kit zoom include lenses that have already been updated to firmware 3.10.

Of course, all future Fujinon XF lenses will automatically come with full PDAF and LMO support, and future XC lenses will support the PDAF.

Still no word if or when Zeiss will offer PDAF and/or LMO support for their Touit lenses.

Please note that these dates are semi-official, so they may still change. As usual, you heard it here first.

By the way, the tiny XQ1 contains an LMO, as well, and I’ve spent a few hours earlier today taking a bunch of sample images. Click here to access the sample set on Flickr.

For your convenience, here’s a TOC with links to my previous X-PERT CORNER articles:

Rico Pfirstinger studied communications and has been working as journalist, publicist, and photographer since the mid-80s. He has written a number of books on topics as diverse as Adobe PageMaker and sled dogs, and produced a beautiful book of photographs titled Huskies in Action (German version). He has spent time working as the head of a department with the German Burda-Publishing Company and served as chief editor for a winter sports website. After eight years as a freelance film critic and entertainment writer in Los Angeles, Rico now lives in Germany and devotes his time to digital photography and compact camera systems. His book “Mastering the FUJIFILM X-Pro1” (Kindle Edition) (Apple iBook Store) (German version) is available on Amazon and offers a plethora of tips, secrets and background information on successfully using Fuji’s X-Pro1 and X-E1 system cameras, lenses and key accessories.