X100s: First Look, test shots and shutter sound at Brandon Remler

Share

X100s menu photo FujifilmX100sComparison4_zps4c903a64.jpg

image courtesy: brandonremler

“Here are some quick shots to illustrate how the Menu/OK button is now raised and feels better, and is easier to control.  It’s amazing how much difference just this extra height makes.”

Fuji put into this camera a lot of improvements. You know about PDAF, split image, focus peaking and more. But there are some more changes that you may like. So, compared to the X100, the X100s has a raised Menu/Ok and a new and improved Auto ISO menu. “The X100s also has a couple new features like the Shutter Count and 0.5 second image review for faster shooting with image playback.” You can see the comparison pics (X100/X100s) in Brandon’s first look here.

In this post here he published his shots with the X-E1 (14, 35 & 18-55 lenses) as well as some snaps with an early pre-production X100s. And for more shots, like the Salad below, click here.

And in Brandon’s youtube video at the bottom of this post you can hear how quite the shutter sound of the new  X100s (with adapter lens) is.

X100s preordersBHphoto / AmazonUS / Adorama / AmazonUK (should be released on March, 1).

image courtesy: brandonremler

Fujfiilm X100s at ISO 2000 – F/2.0 @ 1/45th

100s salad photo GumSalad_zps6ce3f8aa.jpg

X20 preorders: AmazonUS (black / silver) / BHphoto (black / silver) / Adorama (black / silver) / AmazonUK (black / silver) (should be released on March 10) / ebayITA (March 7)

Share

miXed zone: SLR Magic 35mm T1.4, Speed Booster and more

Share

phoblog photo Phoblo_zps96c3cfea.jpg

image courtesy: thephoblographer.com

SLR Magic

– I’ve already posted Steve Huff’s review about the SLR Magic 35mm T1.4 (specs&price). Now, let’s go over to the next one, made by thephoblographer (read here).

Well dampened and easy to turn focus and aperture ring, very good build quality, operation is smooth and easy-going, the image quality is amazing (““this looks like I took it with my Leica M8 and 50mm Zeiss Planar“), some slight softness wide open, very pleasing bokeh…. ok, let the test shots speak from now on! Click here to see them and to read more.

SLR Magic 35mm T1.4 at Adorama or here on slidoo.

Here is the email that Fujirumors reader Yves received form Sales dept at SLR Magic :
“Dear Yves. We have 3 lenses that can be used on Fuji X mount cameras. The SLR Magic 35mm T1.4 lens in X mount is ready now, and you can order with us.  No adapter is needed. The SLR Magic HyperPrime CINE 35mm T0.95 lens is in M mount, only for use via adapter for M to X mount, M to mFT mount, M to E mount.  This lens has APS-H coverage and it does not work on M mount cameras.  This lens will be available around March 2013. The SLR Magic HyperPrime 23mm f/1.7 lens in X mount.  This lens will be available by March/April.”
Thanks Yves. Click here to see his Flickr album.

yves2 photo nikon_zps78938828.png

Speed Booster

… and here a speed booster review at youtube of AFMarcotec.

… and more

– “If pricing has made you hesitant to enter Fujifilm’s X-Series, the X-E1 might be just the thing to draw you in. And if you’re just looking for a really nice rangefinder-style ILC, you should give the X-E1 a try. We think you’ll like it.” popphoto X-E1 test (Click here)

image courtesy: popphoto
XE1 test photo xe1test_zps017d3c30.jpg

– Is it to love or to hate? Here is another X-E1 review. “With the X-E1, YOU are the photographer and the artist. There are no Instagram magic, that makes a dull picture exiting. You have to think up what you want to show in the scene you capture, you have to be an artist and a photographer. And that is why I like it so much. I do believe it forces me to be a better photographer.Read it all here.

– If you want to join a new x-forum, just click here to go to Xtogs. They give away a X20.

-Exploring Time Lapse with the X-E1. Read how it works, step by step, from the images to the final video, by clicking here.

– photographytalk posted 6 tips to make photographing in public easier. First tip: 1) Keep it small… the X100 is perfect! Read 5 more tips here.

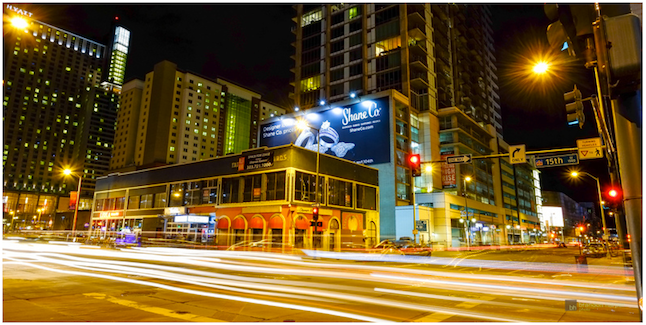
-Mike Kobal’s night shots with the X-E1 and 35mm (specs & price) / 18mm lens (specs &price)… See them here!

image courtesy: Mike Kobal

mike kobal photo mikekobal_zps75d24725.jpg


Share

RAW for JPEG Shooters…

Share

…and JPEG for RAW Shooters!

by Rico Pfirstinger

One of the most persistent flame wars on the “photographic Internet” is the endless fight between RAW and JPEG shooters. If it wasn’t so sad, it would be funny. Readers of my book know that I prefer a comprehensive approach to this hot topic by advising to shoot FINE+RAW (SHOOTING MENU > IMAGE QUALITY) at any time, no matter whether you consider yourself a part of the RAW or JPEG camp. There are plenty of good reasons for being inclusive instead of divisive.

Why “RAW only” shooters should use FINE+RAW

Even if you consider yourself a hardened “RAW only” shooter, FINE+RAW makes sense for you. Don’t forget that you can preview exposures on your camera only in JPEG format. This means that even in “RAW only” mode, your camera will produce a JPEG out of every RAW file it saves to provide you with a preview file. Otherwise there wouldn’t be anything to examine in playback mode.

However, these preview JPEGs in “RAW only” mode are low resolution—often so low that it is impossible to tell whether image details are in focus when you zoom-in to 100%. Shooting in FINE+RAW mode with an IMAGE SIZE of L obviates this problem. With this setting, the camera saves a high-resolution JPEG “print” in addition to the RAW “negative”: You can use this high-res JPEG for precise focus control immediately after you snap it by pressing the command dial, thereby enabling the 100% zoom function. Moreover, the high-res JPEG file is a good point of reference for developing the RAW file later in your personal computer.

Admittedly, you could also opt to shoot in NORMAL+RAW mode instead of FINE+RAW, which doesn’t actually affect the resolution of the JPEG. However, this setting produces files with greater compression, compromising image quality. Dedicated RAW shooters should pay attention to this fact, because in some modes, the camera saves only JPEGs without any RAW files! Think of motion panorama or of ISO, film simulation and dynamic range bracketing as examples for such modes. In all these cases, your X-Pro1 or X-E1 (or X100 and X100S) silently switch the image quality setting from NORMAL+RAW to NORMAL, which means the only image they write to the memory card is a quality-reduced JPEG! And what X-camera user likes to skimp on quality?

Wait, there’s more! The camera’s IMAGE SIZE settings (3:2, 16:9 or 1:1 format with resolutions L, M and S) aren’t available in “RAW only” mode. They are greyed-out. This feature can be valuable for RAW shooters, though, because the camera’s light metering is influenced by the current format settings. If you intend to shoot (and later crop) images to a ratio of 16:9 or 1:1, the light metering works more effectively when the camera’s image format is set accordingly. That’s because parts of the image that are superfluous will be automatically cropped out and won’t affect the camera’s exposure metering (which is based on the current live-view image). Furthermore, it’s easier to target your desired image area when the image format in the camera’s viewfinder matches up with your intended end result. Finally, the camera adjusts the size and shape of the autofocus fields and redistributes them according to your selected image format. This means that you can continue to use all 49 of the camera’s AF fields even when you are shooting in the exotic 1:1 format.

No worries: Independent from any IMAGE SIZE or IMAGE QUALITY settings you choose in the shooting menu, your X-Pro1 or X-E1 will always record a full-size L, 3:2 format RAW file. You will not lose a single pixel.

Why “JPEG only” shooters should use FINE+RAW

Now that the “RAW only” camp has been served, what about the “JPEG only” crowd? After all, this is what this article is supposed to mostly be about, right?

The reason to opt for FINE+RAW comes down to this: All X-series cameras feature an internal RAW converter (PLAYBACK MENU > RAW CONVERSION) that allows you to change an image’s JPEG settings anytime after you take a shot. However, before we examine the implications of this feature, let’s find out about those mysterious “JPEG settings” and let’s see what they actually are.

JPEG settings (or JPEG parameters) are camera settings that do not affect the RAW file. Instead, they only affect the look of any JPEG files your camera spits out. Thinking of RAWs as “digital negatives” and JPEGs as “digital lab prints”, the camera’s JPEG settings determine how the JPEGs actually look like.

JPEG settings are:

  • White Balance
  • WB Shift
  • Film Simulation
  • Color
  • Sharpness
  • Highlight Tone
  • Shadow Tone
  • Noise Reduction (NR)
  • Color Space

As you have probably noticed, there settings are scattered over the shooting and setup menus of the camera. With the exception of color space, they are also directly accessible via the Quick Menu and can be saved in sets known as custom shooting profiles. The same JPEG settings are available when you activate the camera’s internal RAW converter.

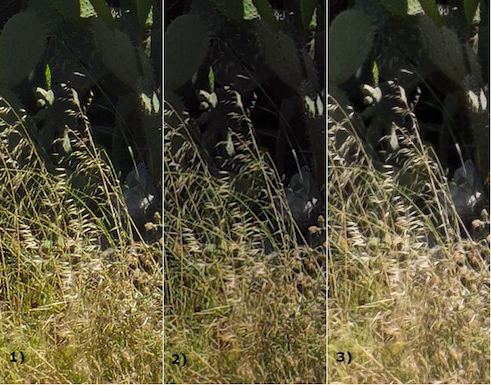
JPEG settings strongly affect the look of an image. The very same shot can look quite differently depending on what JPEG settings you have chosen. Here’s an example of a snapshot I took recently—the following pics all show the same RAW image (“digital negative”) processed with different camera JPEG settings to produce different “digital prints”.

Let’s start with three different color versions:

And here three different black&white versions, again all courtesy of the X camera’s flexible JPEG parameter settings:

As you can see, there can be both strong and subtle differences between different “digital prints”. There are virtually billions of possibilities of how you can combine these JPEG settings to generate an actual image. Quite overwhelming! With normal cameras and as a “JPEG only” shooter, you would have to know/guess and then set the “perfect” JPEG parameter combination for each image in advance. Can you actually do this? Honestly, I can’t.

Share
** CLICK HERE to Read the Rest of the Article **

Reader review (Iulian): “My thoughts about The Fuji X-E1”

Share

Hi, my name is Iulian and I’m from Romania. I’d like to share my thoughts about the Fuji X-E1. Best regards, Iulian.

 “My thoughts about Fuji X-E1 – what bugs me

No photos, just thoughts

Before I start writing about the Fuji X-E1, I have to provide something about my background skills and gear.

I’m relatively young (33 yrs) and I started photography only three years ago. So, I don’t have the shooting on film background. I started with a Sony Alpha A200, upgraded to Sony Alpha A580 and, after that, to Sony Alpha A77. I had some nice lenses, including the very nice 16-50 F2.8 Sony lens and the excellent Samyangs: the 35 1.4, 85 1.4 and 8 2.8 fisheye. I also had the 50 1.4 Minolta AF and Sony primes. After two years of using the DSLR’s I found out that the gear is too heavy for me and, most of it, the noise that came out from the Sony A77 was obvious even at ISO400, when printed at poster size. The IQ was excellent.

I bought the Nex 5N for keeping it light and paired it with the two Sigmas and the Sony 50 1.8, and I also bought the external electronic viewfinder for it. Since I started using the Nex, I also started using the old M42 lenses, the best of them being the Revuenon 55 1.4. This way I started to love the manual focusing, the focus peaking in the viewfinder making it easier and, especially, faster.

Being so pleased with the Nex, I wanted more. So, I bought the Fuji X-E1, paired with the 18-55 Fujinon lens and the SLR Magic 35 1.4.

Now, about the X-E1, from my perspective:

–          The size, the weight and the feeling – they are all there.

–          The 18-55 lens – it’s a nice lens, similar in build quality and IQ with the Sony 16-50 F2.8 lens (very nice lens, but not exceptional)

–          The autofocus of X-E1 is ok in daylight, but very slow indoors, under the room lightings. In fact, is so slow, that, with autofocus, I simply cannot track my 2 yrs old daughter when running or even walking through the house. [personal note: some FR-readers reported that the latest firmware improved AF in low light conditions]

–          So, I thought I should start using the manual focus instead. No chance at all because of:

o   The manual focus on the 18-55 is annoying – no direct focus like the old real manual focus lenses

o   The viewfinder of the Fuji X-E1 might have the same resolution as the external Sony one for Nex – but, because of the slower refresh rate, the ghosting is disturbing

o   The lack of a real focus peaking is something beyond my understanding

–          Because I thought that, if I cannot rely on autofocus indoor, the autofocus of the Fuji 35 1.4 lens doesn’t provide me any help – I bought the SLR Magic 35.1.4 real manual focus. Somehow, I ended being familiar with manual focus at F2 without the help of the magnification in the viewfinder. So, now, I have around 75% keepers in manual focus.

–          Another thing that I observed is the inaccurate LCD of the Fuji. When I have something bright in the photo (like a paper, or a white toy), when reviewing in on the LCD, the brightest objects have no details. When I look through the viewfinder, those objects appear to have some details. When I check the histogram, everything is ok. And, when I check on my computer, all the details are there. It’s only the LCD of the camera that cannot show me anything.

–          The small flash it’s nice and, when bounced indoors, it’s even great.

Outside, the camera has another face. I think of my Fuji like as a Phoenix bird. It simply reborns every morning. It’s such a nice camera for everything else but indoors and sports.

The photos have colors, vibrancy, sharpness and no disturbing noise.

I give Fuji so much credit, that I bought a leica M to Fuji X adapter and intend to buy two Voigtlanders: the Skopar 25 F4 Pancake and the Heliar 75 1.8 for portraits. Hopefully, one day, Fuji will provide the focus peaking via firmware.

Maybe stupid, maybe not, I sold all my Sony gear, except the Nex 5N and the Revuenon 55 1.4, and I intend keeping and, eventually, falling in love with the X-E1.”

Share

Capture One tests

Share

C1

More and more photographers tested the new Capture One 7.0.2 ($300, trial available). Since neither Apple’s Aperture nor DxO Labs’ Optics Pro do yet support the X-Trans format, this is an important choice to consider.

I tested the Capture One Pro beta about 2 weeks ago, and I am pleased to report that its raw conversion algorithm improves the color artifacts from the X-Trans sensor in Fuji X camera, but the offensive artifacting remains there plain to see.” Read more at diglloyd.com.

Here is Thomas Fitzgeralds first look at C1. “It’s not completely perfect. There are still some weird de-mosiacing artefacts, but it’s substantially better than what Lightroom was producing… Anyway, I’m delighted that someone has finally unlocked the true potential of the X-Trans sensor.” Read all and see his converted images here.

frontallobbings: “There’s still issues with Capture One and the details. Moire seems to be an issue that causes an unusual maze like pattern to appear in specific textures and still some smearing of details happens. However the great news is that it smears at a much higher detail rate over Adobe’s implementation of these files… I’m hopeful these minor issues will be resolved in the next version of Capture One, but for now, it’s very nice to have a professional RAW processor that at leasts matches the output quality of the JPG files out of camera, with far more flexibility found in RAW processing.Click here to read more and see his comparison images (Lightroom vs C1).

Capture One 7.0.2 and the X-E1 short words at skullfilmsproductions: “Well It is a good software, I will give them that, the RAW is alot better supported!.. However for me coming from Lightroom and everything set up to work.. this experience has been.. not horrible but CaptureOne is slooooow to work in.. as.. well I dont know what is this slow.”

Here are the French lemondedelaphoto pics converted with C1 (translated version)

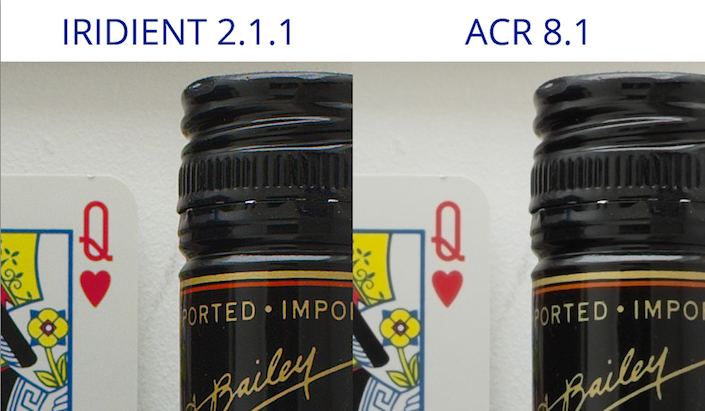
And here another Lightroom / CaptureOne comparison at seriouscompacts. “The biggest differences I noted between C1 and Lightroom are that C1 has higher local and increased color saturation. I also think C1 handles high ISO noise reduction better, while Lightroom is slightly more able to recover highlights.

Share