dcraw
Marius: “Hi Patrick, Just wanted to let your readers know that the latest dcraw (v9.18) has support for X20 and X100s. Thus far this is only solution for the few folks using Linux exclusively. It’s possible this support will be included in Darktable and RawTherapee soon. Thanks for all the interesting bits on your website.” They told me that interpolation for all X-Trans sensor cameras is much improved.
Best of…
– Who’s the king of the advanced compact cameras according to techradar? It’s the [shoplink 12883 ebay]X100S[/shoplink]. “Its image quality is also good, but it is surpassed by that of the Fuji X-Pro1, which is capable of producing pictures that aren’t far off those from some full-frame cameras.” Check it here.
– And techradar has also the answer to the following question! Which of these 6 high-end compact cameras is the best? The competitors are the [shoplink 12884]X20[/shoplink], [shoplink 13127]Sony RX100[/shoplink], [shoplink 13128 ebay]Panasonic LX7[/shoplink], [shoplink 13129 ebay]Nikon P7700[/shoplink], [shoplink 13130 ebay]Olympus XZ-2[/shoplink], [shoplink 13131 ebay]Canon G15[/shoplink]. Discover the winner here.
X100S
[shopcountry 12883]
– henrysmithscottage took his X100S and X-PRO1 to a trip in Baltimore. Read his considerations about these cameras here: “I have noticed, that compared to its predecessor the X 100, the X100s appears to have a decreased battery life. This had been annoying to me before the trip, but I learned that if you keep the camera off (and not rely on the auto shut off feature), that the battery life was quite tolerable. I did not need to change a battery over the three days of the trip (probably shooting 150 frames).”
– NY ist the Mecca for street photography, and rileyjoseph took some shots there with the X100S and X-PRO1 that you can check out here. “So will I be selling my dSLR and only using my X00s + X-Pro1? No. I will keep it for the times that I need a full frame, faster AF camera with the availability of a tilt shift lens. Primarily for when I am going to make a specific photo that would require it. It is a great tool. Great and heavy.”
– Roel has the X100S since two months now. Did he regret selling his X100? “As I started off saying in this article, I don’t want to have any regrets in life. Although I regretted selling my original X100, I have no regrets in purchasing the X100S and I will keep it in my bag until one of us dies. It is an excellent fixed lens camera and I am sure it will give me many years of great service and images. Fujifilm has done a good job with their X series cameras. In the beginning, new products (X10, X100 and X-Pro1 specifically) had a number of problems that needed to be sorted out, but now it seems that recent releases (such as the X-E1, X20 and X100S) have very few, if any initial issues – plus the Fujinon lenses are exceptional. That is good news for all of us in the Fujifilm camp and I encourage them to keep innovating and listening to user feedback.” Read the whole review and see his shots here.
lenses
Fuji XF 55-200mm [shopcountry 12892]
– Tom Grill posted his hands on review (with many downloadable hi res image samples) of the new 55-200 here:
“Looks like Fuji produced another winner with the 55-200mm for its line of zoom lenses. It shows true professional qualities: no distortion, solid build, high resolution, image stabilization, and quick focus. This is a lot for a lens with a $699 price tag, much better than most zooms I have tested in this price range, and even better than some costing several times as much.”
image courtesy: aboutphography

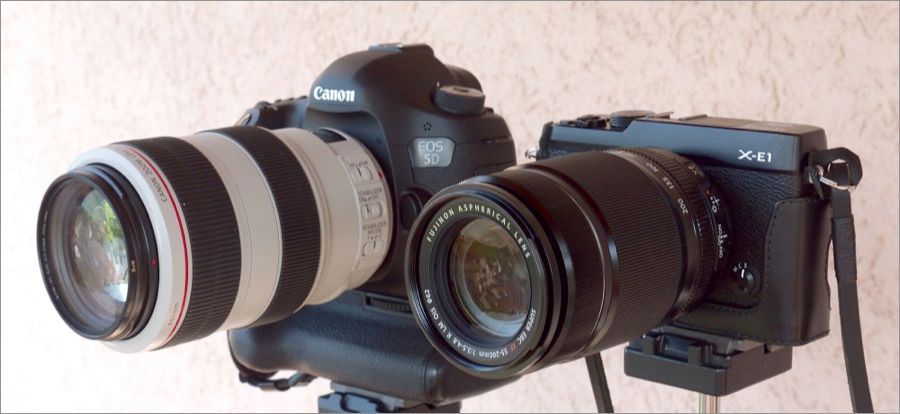
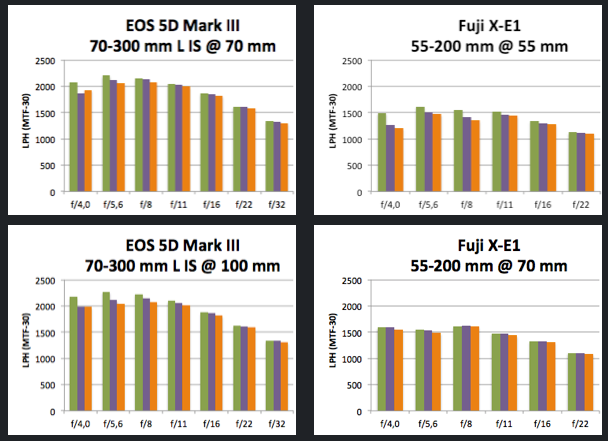
– photogenykstudios posted his 55-200 impressions and samples here: “At $699 its not near as cheap as the 55-200 variations from Tamron, Sigma and Sony. It is far better built though, and is stabilized. The IQ is also in a different league from the budget zooms. Its closest rival would be the [shoplink 13385]Canon 70-200/4[/shoplink]. The Canon is faster at the long end (barely), has less range, and costs more, so again the Fuji wins here.”
– sgoldswoblog tested the Zeiss Touit 12mm lens here.
“The 12mm has some bad features compared to the Fuji 14, it has softer corners at wider apertures, it isn’t optically corrected for distortion and it is expensive. There is no question that fans of the 20-21mm focal length shouldn’t really go for the Zeiss. So it’s a Turkey? No way, it’s a very fine lens with some different design choices from the Fuji, that’s all. If you want the widest possible UWA then go for this lens. By definition it is wider but it is also a fine lens in its own right and I still suspect the centre is a hair sharper than the Fuji.[…] The only reason this lens doesn’t deserve superlatives left and right is the existence of the Fuji 14mm. If the Fuji didn’t exist or was a little bit more average, the 12mm would be a must buy lens, as it is it’s a very good lens that’s not as good primarily because of variations in sharpness in the corners. However there is no question in my mind that a person wanting the widest lens available shouldn’t hesitate in buying the Zeiss instead of the Fuji 14.”
image courtesy: sgoldswoblog

Zeiss Touit 32mm in stock status check: USA: Adorama / BHphoto / AmazonUS / Uniquephoto / Pictureline / Europe: AmazonDE / ebayUK / PCHstore Brussel
Zeiss Touit 12mm in stock status check: USA: Adorama / BHphoto / AmazonUS / Uniquephoto / Pictureline / Europe: AmazonDE / ebayUK / PCHstore Brussel

