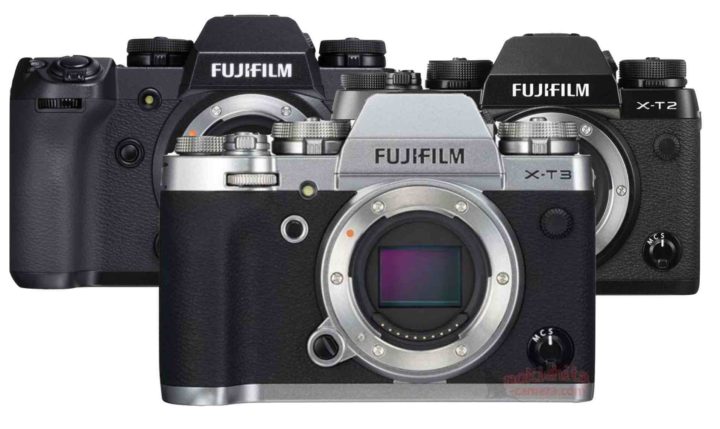
So what, is it worth to upgrade from a Fujifilm X-T2 or even Fujifilm X-H1 to a Fujifilm X-T3?
Well, only you can decide it, but in order to help you, I have listed all rumored Fujifilm X-T3 specs side by side with the ones of the Fujifilm X-T2 and X-H1.
I have been informed (thanks) that the Fujifilm X-T3 will have the same button layout of the Fujifilm X-T2. Also the form factor will remain the same, with just some minor changes. Hence, once it will be announced, you won’t really notice any difference over the X-T2.
For me this is a good news, since the X-T design is loved by many just as it is now. Fujifilm did create the X-H line appositely to have more design freedom and craft a more DSLR-like camera. But the X-T should mantain it’s current form factor.
Switching systems is a big step no matter how well you know photography. Reviews do a good job of explaining how good the camera is, but they aren’t very good at explaining the learning curve which may or may not be painful coming from one system to another.
For Nikon switchers, I’ve tried to cover the differences in article. It’s written primarily coming from a full frame Nikon (or the D750 in my case) so it may not be applicable to all Nikon’s. It’s a little long but hopefully I’ve covered it in enough detail to keep everyone happy.
I recently purchased the Fuji X-T2 and have been using it to shoot video. The reason for this article is to share some of the things that I find the X-T2 does well in terms of 4K video capture, and provide a few areas in which Fuji could improve the experience for video capture with firmware updates. Also I will share a very valuable lesson that I discovered that cost me a day of filming!
My setup
Along with the X-T2, I bought Fuji’s Vertical Power Booster Grip, which is a must for filming in 4K. Not only does having this allow you to film up to 30 minutes at a time (without it you’re limited to 10 minute clips), I find that having the included power adapter that came with the grip extremely helpful when filming interviews and the camera is locked down on a tripod. I never have to worry about charging batteries! (Note, even though you may be plugged into power, the internal battery in the camera itself will slowly drain over time, so keep that in mind).
For lenses I’ve mainly been using the Fuji XF 16-55 F2.8 R LM WR. I find that the zoom range is useful when recomposing the shot to adjust for head room, and the F2.8 max aperture allows for some decent separation from the background. When a bit more shallow depth of field is desired, I use the Fuji XF 35mm F2 WR. It has some beautiful bokeh and is very sharp!
For monitoring video, and to aid in making sure the shot is in focus, I recently acquired the Black Magic Video Assist 4K 7” monitor which is also serves as an external recorder. Using it allows you to film longer than 30 minutes (if you need to) and the ability to save out in F-Log for color grading. I’ve only used this monitor a couple times, but there’s very important something to understand about using it with the Fuji. More on that later.
What I find works well
4K video quality – The video that comes out of this is simply amazing in terms of sharpness. Its most likely due to the fact that it actually shoots 6K video internally and down samples to 4K for output. The 1.17 crop factor is not a big deal for me, but its something to be mindful when switching back and forth from shooting HD.
Focus Peaking – I’ve found that when focusing manually, changing the color to red works the best.
Continuous AF – When filming a subject that is moving and its challenging to focus manually, I find that the using the continuous AF with face stabilization enabled does a pretty good job.
Analog Controls – Before using the X-T2, I was using Canon DSLR’s for my video work. One of the best features on the X-T2 that I prefer over Canon is the fact that I can easily see what my aperture, ISO, and shutter speed settings are on the dials. I know you can see those settings on the top LCD of most Canon DSLR’s, but I find Fuji’s implementation better.
What I think could be improved
Histogram – There is no way to view the histogram when shooting video, its only an option when shooting stills.
Support for F-Log Internally – For those who can’t afford or don’t want to shoot to an external recorder, it would the great to have the option to get Flog internally.
Change ISO while recording – Currently the only way to adjust exposure while filming is to change the shutter (not recommended) or aperture (can affect DOF). Changing the ISO could do this, you can turn the dial but it won’t change while recording.
Shooting with an External Recorder
Before getting the Black Magic Video Assist 4K in order to get a flat looking image that could be color corrected, I tried shooting with Pro Neg. Std profile, and made the following tweaks:
Highlight tone -2
Shadow tone -2
Color – 4
Sharpness down to -4
Now with the Black Magic monitor I have the ability to shoot F-Log externally. However there are a few things to consider. If you are recording 4K video you have three options as to where to save the video, on the SD card, externally via HDMI, and externally via HDMI with Flog. (Note when using Flog, the camera suggests that your minimum ISO be 800, not sure why).
If you choose to record to the internal SD card in 4K, you can also send out an HD stream via HDMI that can be recorded, however if you choose to record in 4K externally you can only record externally and not internally at the same time. I made the assumption you could. Also keep in mind that recording externally can generate huge files depending on what kind of codec you choose in the external recorder.
The last point that I want to make is be careful when using SD cards in the Black Magic Video Assist 4K and in your Fuji cameras. I found out the hard way that the formatting used is not compatible between the two.
I had the bright idea of swapping cards between the camera and the monitor and formatted an SD card in the Black Magic, which uses HFS+ or exFAT. I chose exFAT. When I decided not to record to the Black Magic and stuck the card in the X-T2, which uses Fat32, I ended up with a card that looked like it didn’t record anything! Fortunately using Lexar recovery software I was able to rescue 80% of the footage and we didn’t have to reshoot too much.
The lesson I learned is always format the card in the device you’re going to be using it in, and don’t assume that all devices use the same format!
TheCameraStore just shared their Big JPEG shootout here. They compare the Pentax K7D, Olympus Pen F, Nikon D500, Canon 80D, Panasonic G85, iPhone 7+, Fujifilm X-T2 with default factory settings.
The goal was just to show how JPEG’s straight out of the box look like and what people tend to find more pleasing.
They took some shots under different conditions, printed them all and let them evaluate by customers, staff members, Pro photographers, amateurs and professional printers.
Some of the results:
Portrait: Winners: 1st Nikon, 2nd Canon, 3rd Pentax. Losers: Panasonic, Olympus, iPhone Landscape: Winners: 1st iPhone, 2nd Panasonic, 3rd Olympus. Losers: Worst of all Sony. A note regarding Fuji and Nikon: they exposed a bit darker out of the box, and therefore people perceived them as muddy. Lab Test: Winners: 1st Sony, 2nd Nikon, 3rd Canon. Losers: iPhone
So you see, a lot of inconsistency between cameras according to the scenarios they were used.
Regarding Fujifilm, TheCameraStore thinks the X-Pro2/T2 does not have the same uniquess as older X-Trans 1/2 cameras have over the competition.
It would be nice to see also how the different film simulations perform in the above mentioned scenarios compared to the dedicated presets of other camera manufacturers. Velvia (for landscapes), Astia (for portraits), Acros (for black and white) and Co…. these film simulations have been specifically designed to get the best results in different areas, and applied to the above scenarios, they might have shown where the famous “Fuji Colors” reputations comes from.