The Perfect Exposure

Exposing and Editing RAW Files the Right Way

The path to technically optimal images leads through two stages: the best possible RAW exposure and competent post-processing. That’s why my Fuji X Secrets RAW workshops deal with both aspects equally.

by Rico Pfirstinger

Note: This is the English version of my German blog entry on Fuji X Secrets. Click here to read the original article in German.

From time to time, participants submit images to my RAW workshops that have been exposed incorrectly. Usually, this is because they want to compensate for their exposure error by processing the RAW image and “salvage” it somehow. This is based on a misunderstanding: RAW processing is not primarily intended as a rescue expedition to improve the technical (and sometimes also creative) mishaps of photos that have turned out badly. Although this may well be possible in individual cases, our goal should be to deliver RAW files that are as technically well exposed as possible. Then we can process them with all the skill at our disposal to make the most out of them.

Garbage In, Garbage Out

The quality of the captured RAW data determines what you can achieve with them in the RAW converter. A simple rule applies: The more light the camera can capture in a shot, the technically superior the image will be. So, do you overexpose vigorously? Of course not! A shot with blown-out highlights that cannot be recovered in the RAW converter is not attractive.

The principle of letting as much light hit the sensor as possible is thus limited by the fact that image-critical highlights in the scene should not be destroyed by the exposure. The photographer decides what is image-critical, not the camera. For a technically pristine image, it is always better to control the camera – rather than being controlled by it.

The Correct Exposure

To set the optimal exposure for a scene, we need some help. Fujifilm’s mirrorless X and GFX Series cameras have several things going for them in this respect:

  • The live view usually (not always!) displays a WYSIWYG preview of the JPEG shot – and thus also serves as an exposure preview.
  • Respectively, the RGB histogram shows the brightness distribution of the JPEG for each individual color channel.
  • A blinking overexposure warning indicates overexposed (blown-out) areas in the live view.
  • Spot metering allows pinpoint brightness measurements for isolated areas in manual exposure mode (M).

Since the live view, the histogram and the blinking overexposure alerts always refer to the JPEG to be generated by the camera (and not to the RAW data), they are based on the JPEG settings that apply at the time. So, it does make a difference which film simulation, contrast or white balance setting is currently in effect. This allows us to specifically find in-camera JPEG settings that are closest to the potential of the RAW data – let’s call them “JPEG settings for RAW shooters”.

Live view, histogram and overexposure warnings depend on the currently selected JPEG settings of the camera. The image above shows the factory settings of an X-H1, the one below our custom “JPEG settings for RAW shooters”. For the live view and the histogram to correspond as closely as possible to the exposure of the RAW file, I recommend low-contrast JPEG settings with reduced color saturation. 

** CLICK HERE to Read the Rest of the Article **

DPReview Compares Adobe Camera Raw vs. Free Capture One Express

As you might or might not know, I did switch to Capture One back in 2019.

  • read here – It Was Inevitable: I am Leaving Lightroom for Capture One Pro

I went for the full version (the one that supports all cameras, not only Fujifilm cameras).

But for those of you who would like to make some basic editing without paying a single penny, Phase One offers Capture One Express for Fujifilm.

Capture One Express obviously does not offer all features of the full version, and you can see a side-by-side comparison of the features on this page.

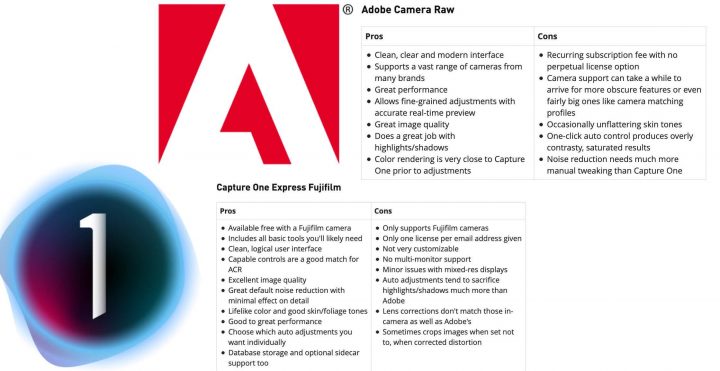
And yet, DPReview went on to compare subscription based Adobe Camera RAW with the free Capture One Express for Fujifilm version.

Down below the final Pros and Cons they identify for each software.

** CLICK HERE to Read the Rest of the Article **

FUJIFILM Updates RAW File Converter EX and FUJIFILM Tether Plugin PRO for GFX for Adobe

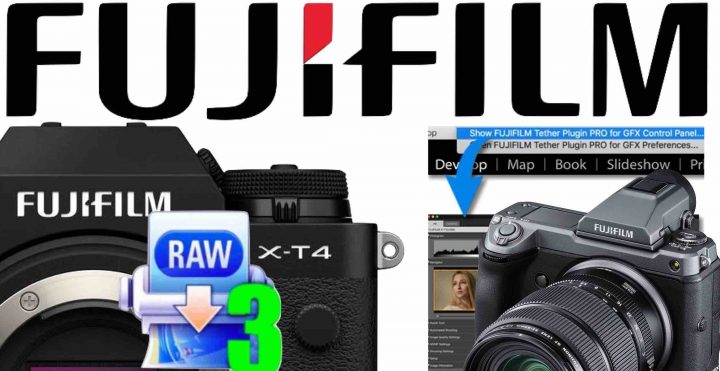
Fujifilm has updated RAW File Converter EX and Tether Plugin PRO for GFX.

RAW FILE CONVERTER EX powered by SILKYPIX – download here

The software update Ver.8.1.5.0 incorporates the following issues:

  1. Applicable model for the “RAW FILE CONVERTER EX 3.0 powered by SILKYPIX” is added.
    Applicable Model : FUJIFILM X-T4
  2. Compatibility with Mac OS is from OS X v10.9 to macOS 10.15.

FUJIFILM Tether Plugin PRO for GFX” for Adobe Photoshop Lightroom Classic CC / 6 – download here

The software update Ver.1.16.0 incorporates the following issues:

  1. RAW RECORDING setting can be set from the computer.
  2. DYNAMIC RANGE setting can be set from the computer.
  3. For Windows: It can be used only on Windows (64 bit).

FujiRumors is on Patreon, Facebook, Instagram, RSS-feed, Youtube, Flipboard and Twitter

Our Owners Groups

Our Facebook Pages

X-LR v.2.0 Released: Plug-in that Automatically Applies Fujifilm Film Simulations in Lightroom

We reported first about X-LR back in March 2017 here.

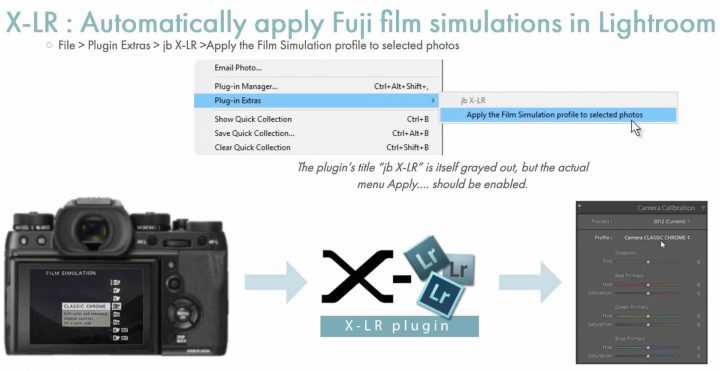
X-LR is a Lightroom plug-in that reads Fujifilm’s Film Simulation from your RAW file and automatically applies corresponding profile when you import your images to Lightroom.

Now X-LR is receiving an update.

You can find a version 2.0 of the X-LR plugin for Lightroom at lightroomsolutions here.

One big issue it fixed is that Adobe quietly introduced new film simulation profiles with a v2 suffix for the X-T3 and now the X-T30. This release addresses that change and supports any new Fuji cameras for which Adobe introduce v2 profiles.

It has other improvements too:

  • Supports Adobe’s v2 profiles for X-T3 and X-T30 cameras
  • Support for X-H1 Eterna film simulation
  • Extracts maker notes as custom fields
  • Can run a preset if the camera detected faces
  • Read ratings and film simulations from JPEG-only shots
  • Expert Mode
    • Incremental Lightroom slider values
    • Ranges of values – eg FacesDetected tag greater than 1 can apply a portrait preset
  • Better logging

Follow FujiRumors on Facebook, Flipboard, Youtube, Instagram, RSS-feed and Twitter.

Rumors and Discussions

Stay in the Loop