RAW for JPEG Shooters…
…and JPEG for RAW Shooters!
by Rico Pfirstinger
One of the most persistent flame wars on the “photographic Internet” is the endless fight between RAW and JPEG shooters. If it wasn’t so sad, it would be funny. Readers of my book know that I prefer a comprehensive approach to this hot topic by advising to shoot FINE+RAW (SHOOTING MENU > IMAGE QUALITY) at any time, no matter whether you consider yourself a part of the RAW or JPEG camp. There are plenty of good reasons for being inclusive instead of divisive.
Why “RAW only” shooters should use FINE+RAW
Even if you consider yourself a hardened “RAW only” shooter, FINE+RAW makes sense for you. Don’t forget that you can preview exposures on your camera only in JPEG format. This means that even in “RAW only” mode, your camera will produce a JPEG out of every RAW file it saves to provide you with a preview file. Otherwise there wouldn’t be anything to examine in playback mode.
However, these preview JPEGs in “RAW only” mode are low resolution—often so low that it is impossible to tell whether image details are in focus when you zoom-in to 100%. Shooting in FINE+RAW mode with an IMAGE SIZE of L obviates this problem. With this setting, the camera saves a high-resolution JPEG “print” in addition to the RAW “negative”: You can use this high-res JPEG for precise focus control immediately after you snap it by pressing the command dial, thereby enabling the 100% zoom function. Moreover, the high-res JPEG file is a good point of reference for developing the RAW file later in your personal computer.
Admittedly, you could also opt to shoot in NORMAL+RAW mode instead of FINE+RAW, which doesn’t actually affect the resolution of the JPEG. However, this setting produces files with greater compression, compromising image quality. Dedicated RAW shooters should pay attention to this fact, because in some modes, the camera saves only JPEGs without any RAW files! Think of motion panorama or of ISO, film simulation and dynamic range bracketing as examples for such modes. In all these cases, your X-Pro1 or X-E1 (or X100 and X100S) silently switch the image quality setting from NORMAL+RAW to NORMAL, which means the only image they write to the memory card is a quality-reduced JPEG! And what X-camera user likes to skimp on quality?
Wait, there’s more! The camera’s IMAGE SIZE settings (3:2, 16:9 or 1:1 format with resolutions L, M and S) aren’t available in “RAW only” mode. They are greyed-out. This feature can be valuable for RAW shooters, though, because the camera’s light metering is influenced by the current format settings. If you intend to shoot (and later crop) images to a ratio of 16:9 or 1:1, the light metering works more effectively when the camera’s image format is set accordingly. That’s because parts of the image that are superfluous will be automatically cropped out and won’t affect the camera’s exposure metering (which is based on the current live-view image). Furthermore, it’s easier to target your desired image area when the image format in the camera’s viewfinder matches up with your intended end result. Finally, the camera adjusts the size and shape of the autofocus fields and redistributes them according to your selected image format. This means that you can continue to use all 49 of the camera’s AF fields even when you are shooting in the exotic 1:1 format.
No worries: Independent from any IMAGE SIZE or IMAGE QUALITY settings you choose in the shooting menu, your X-Pro1 or X-E1 will always record a full-size L, 3:2 format RAW file. You will not lose a single pixel.
Why “JPEG only” shooters should use FINE+RAW
Now that the “RAW only” camp has been served, what about the “JPEG only” crowd? After all, this is what this article is supposed to mostly be about, right?
The reason to opt for FINE+RAW comes down to this: All X-series cameras feature an internal RAW converter (PLAYBACK MENU > RAW CONVERSION) that allows you to change an image’s JPEG settings anytime after you take a shot. However, before we examine the implications of this feature, let’s find out about those mysterious “JPEG settings” and let’s see what they actually are.
JPEG settings (or JPEG parameters) are camera settings that do not affect the RAW file. Instead, they only affect the look of any JPEG files your camera spits out. Thinking of RAWs as “digital negatives” and JPEGs as “digital lab prints”, the camera’s JPEG settings determine how the JPEGs actually look like.
JPEG settings are:
- White Balance
- WB Shift
- Film Simulation
- Color
- Sharpness
- Highlight Tone
- Shadow Tone
- Noise Reduction (NR)
- Color Space
As you have probably noticed, there settings are scattered over the shooting and setup menus of the camera. With the exception of color space, they are also directly accessible via the Quick Menu and can be saved in sets known as custom shooting profiles. The same JPEG settings are available when you activate the camera’s internal RAW converter.
JPEG settings strongly affect the look of an image. The very same shot can look quite differently depending on what JPEG settings you have chosen. Here’s an example of a snapshot I took recently—the following pics all show the same RAW image (“digital negative”) processed with different camera JPEG settings to produce different “digital prints”.
Let’s start with three different color versions:

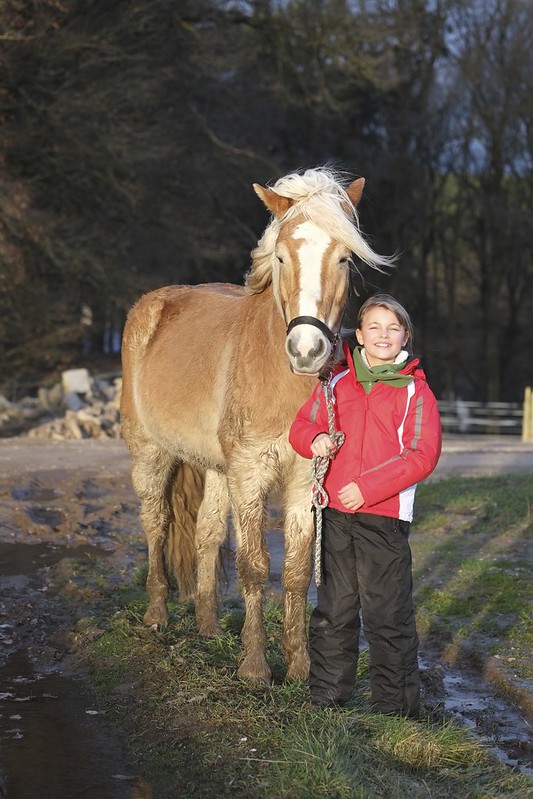
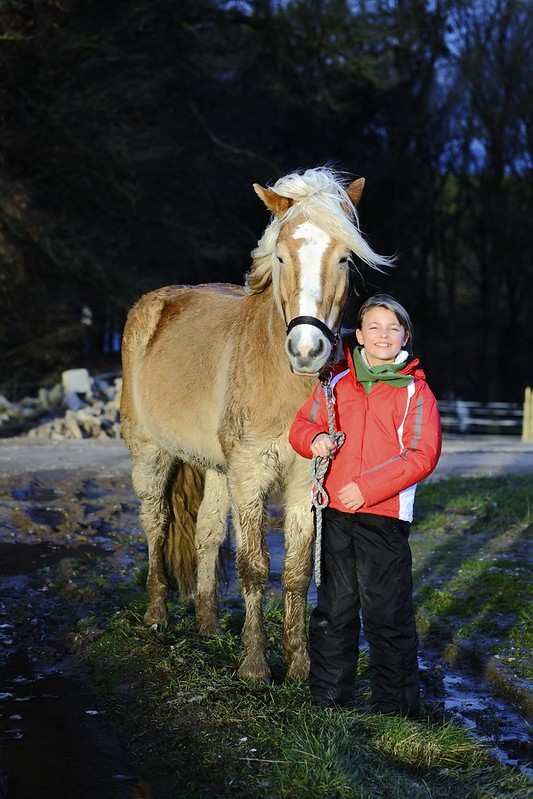
And here three different black&white versions, again all courtesy of the X camera’s flexible JPEG parameter settings:

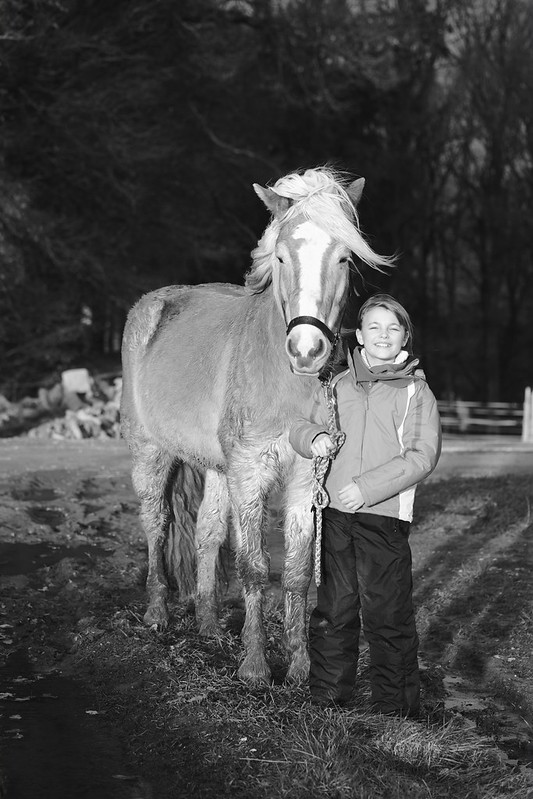
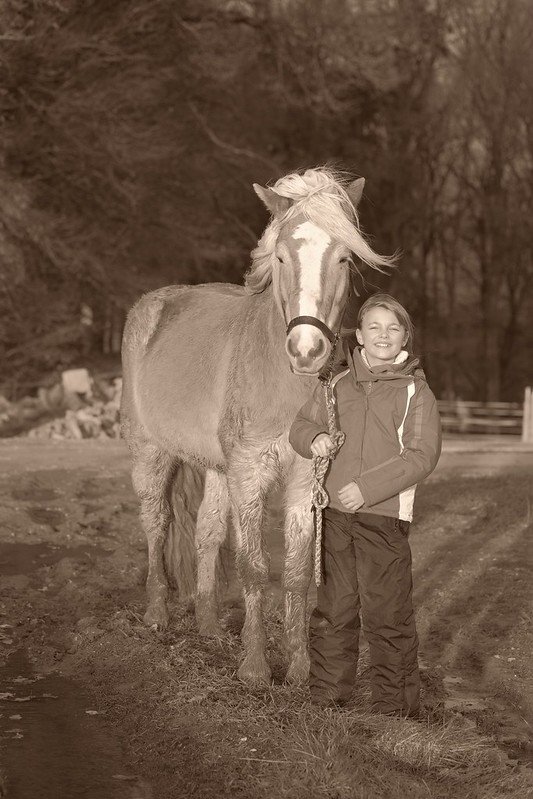
As you can see, there can be both strong and subtle differences between different “digital prints”. There are virtually billions of possibilities of how you can combine these JPEG settings to generate an actual image. Quite overwhelming! With normal cameras and as a “JPEG only” shooter, you would have to know/guess and then set the “perfect” JPEG parameter combination for each image in advance. Can you actually do this? Honestly, I can’t.


