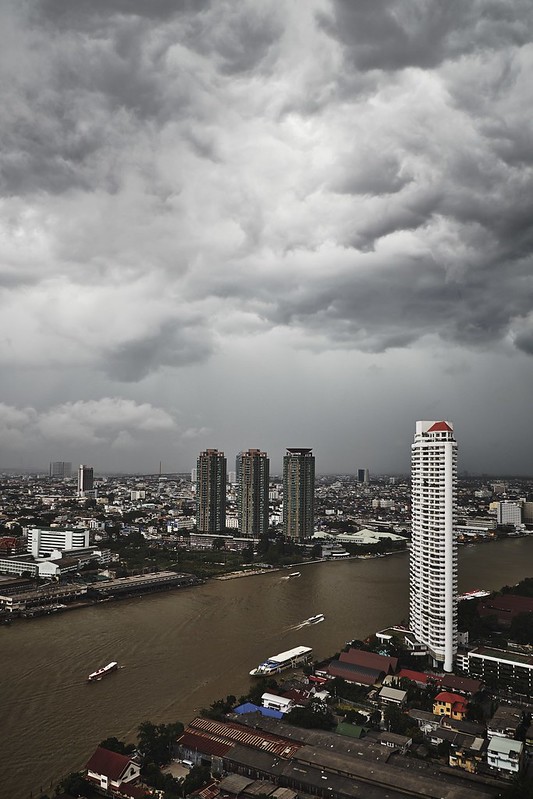
XF14mmF2.8 R appears to be almost distortion free

by Rico Pfirstinger

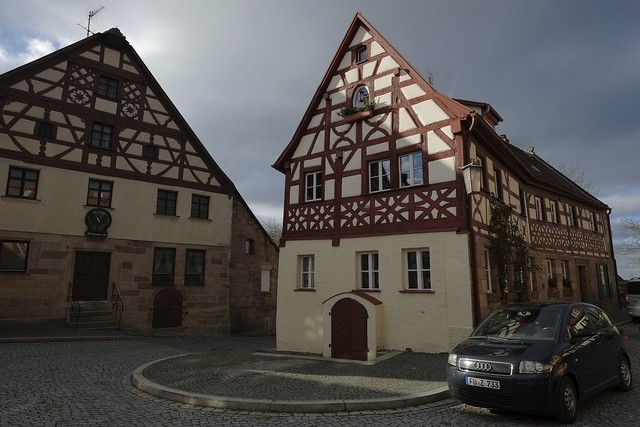
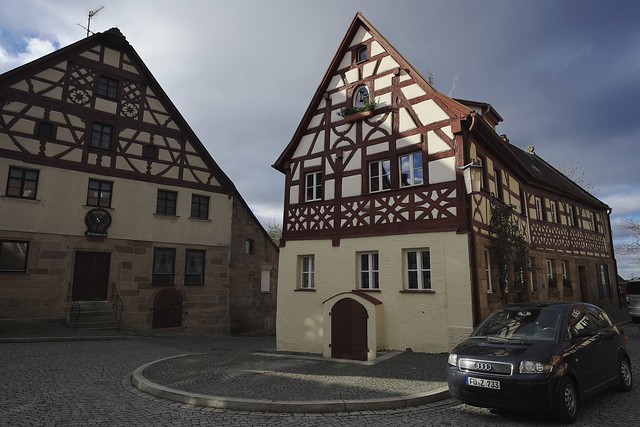
I may have found some interesting news about the 14mm prime. Comparing the uncorrected version of a shot with its software corrected SOOC JPEG version reveals that Fuji’s new XF14mmF2.8 R prime lens is apparently almost perfectly optically corrected. This means that the lens doesn’t really need any substantial software corrections which typically have a negative impact on image quality, particularly near the edges of an image.

Have a look at this example (click on the images for high-res versions):

DSCF6742 - RPP (no lens correction)

DSCF6746 - SOOC JPEG

The image above was developed in RPP 64, a Russian RAW converter based on DCRAW that does not interpret or apply any optical correction metadata that the camera is storing in a RAW files.

The image below is a JPEG straight out of the camera that includes all software corrections in the metadata, since the internal RAW converter of the cameras does of course interpret and apply optical correction metadata stored in the RAW files.

It appears that there are only minimal differences between both versions. This suggests that the 14mm is already fully corrected in the lens and does not need any significant additional software corrections. This is good news, as it suggests that the lens (the examples are from a not yet fully suppoerted pre-production sample) will perform well not only in the center, but also near the edges of an image.

EDIT: To wrap things up, here’s also a Silkypix 5 version of this sample:

DSCF6742 - SIlkypix 5

Since Silkypix is actually using lens correction metadata in the RAW file, this result pretty much overlaps with the SOOC JPEG.

If you want to see more 14mm samples, have a look at my Flickr set.

Rico Pfirstinger studied communications and has been working as journalist, publicist, and photographer since the mid-80s. He has written a number of books on topics as diverse as Adobe PageMaker and sled dogs, and produced a beautiful book of photographs titled Huskies in Action (German version). He has spent time working as the head of a department with the German Burda-Publishing Company and served as chief editor for a winter sports website. After eight years as a freelance film critic and entertainment writer in Los Angeles, Rico now lives in Germany and devotes his time to digital photography and compact camera systems. His book “Mastering the FUJIFILM X-Pro1” (Kindle Edition) (Apple iBook Store) (German version) is available on Amazon and offers a plethora of tips, secrets and background information on successfully using Fuji’s X-Pro1 and X-E1 system cameras, lenses and key accessories.

How to Expand Dynamic Range

by Rico Pfirstinger

It appears like two thirds of our X-PERT CORNER readers wanted to know more about dynamic range (DR) expansion. So here we go! Does the following scenario sound familiar? You take a picture of a landscape that looks wonderfully beautiful to the naked eye, only to find out later that the blue sky no longer looks blue and the fascinating cloud formations are just white blobs. The reason for this and similar disappointments is that the scene captured in the image has a larger dynamic range than your camera.

Every camera sensor is capable of capturing only a certain range of luminance—that is, a limited range between the brightest and the darkest parts of an image. The X-Pro1/X-E1’s range covers about 9.5 f-stops or exposure values. In other words, there are 9.5 EV between the minimum amount of light required for the sensor to depict something more than black pixels and the maximum quantity of light beyond which the sensor registers white pixels. This is the dynamic range of the camera. Within this range, the X-Pro1 or X-E1 can depict levels of brightness between pure black and pure white.

“Hardware” solutions

Unfortunately the world doesn’t abide by these limits, and many subjects exhibit a larger dynamic range than the camera is capable of capturing. We see these limitations, for example, in backlit situations and when people are standing in the shadow of an entrance. Professional photographers (and film directors) reduce the dynamic range of their subjects by using additional light. That’s why you’ll see an entire arsenal of floodlights and reflectors on large film sets even on bright days.

Only the luckiest photographers have the luxury of elaborate lighting equipment. Most of us have to make do with natural lighting, which often produces contrast in our subjects that exceeds a range of 9.5 EV. When you try to photograph these subjects with your X-Pro1, your images will either have blown-out white areas or blocked-up shadows, regardless of the combination of aperture and shutter speed you use. They may even have both! Contrasts that the human eye (or more accurately, the human brain) seems to process without any trouble pose near-impossible challenges for even the best cameras.

Then again, even a setup with studio lighting can involve plenty of dynamic range, that’s why I shot the following SOOC (= straight out of camera w/o further post-processing) JPEG in February 2012 in Warsaw using the DR Auto function of my pre-production X-Pro1. The camera chose DR400% and preserved the highlights of the skin (which was illuminated by daylight coming through a train window on the right). Click on the image for a high-res version:

DSCF2502

But let’s get back to hardware: You can also use a graduated neutral density (ND) filter to decrease the dynamic range of a scene, typically a landscape. The top half of such a filter is dark and the bottom half is clear. The dark area is placed over a scene’s high-intensity region, such as the sky. Though this doesn’t increase the fixed dynamic range available in the sensor, it stretches usable dynamic range in practice.

Or you could use a camera with an EXR sensor, like the X10 or the X-S1. Then again, interest in getting to know more about EXR appears to be lackluster, as the number of votes for an “EXR Special” of this column is still ranking below 1000. Maybe this will change over the weekend? Here’s the poll, again:

Do you agree with the position of Fuji about IBIS?

View Results

Loading ... Loading ...

The following SOOC JPEGs from my X10 were taken in South Africa and show how EXR cameras can handle subjects with plenty of DR (click on the images for high-res versions):

** CLICK HERE to Read the Rest of the Article **

How to Use Extended ISO

by Rico Pfirstinger

The X-Pro1 and X-E1 offer a so-called Expanded or Extended ISO range with values of ISO 12800 and ISO 25600, but there’s a catch: These ISO settings are only available in JPEG mode, so you won’t be able to save these images as RAW files. So these options are only available when the RAW shooting is disabled and your camera is set to JPEG Only mode. As you may expect, the results of these very high ISO settings are typically accompanied by visible image noise and some loss of detail.

What’s hiding behind the Extended ISO range? At these two ISO settings, the X-Pro1 and X-E1 record RAW images at ISO 6400, hence underexposing them by one or two exposure values (EV) and then boost up the exposure again when the image data is converted to a JPEG. This means that you can achieve the same results by setting your camera to ISO 6400 (with RAW mode enabled) while turning the compensation dial to –1 EV or –2 EV, and then using the internal or an external RAW converter to push the image one or two exposure values in order to compensate for this underexposure.

Employing these Extended ISO values results in an unavoidable loss of quality, so you should only use them in emergencies. You actually retain more flexibility if you underexpose your image while shooting with ISO 6400 in FINE+RAW (or RAW Only) and then plan on adjusting the exposure manually during the RAW conversion.

Here’s how it looks (click on the images for high-res versions):

ISO 12800

ISO 25600

These two examples illustrate shooting in Extended ISO 12800 (above) and 25600 (below). When you click on these images to open them in Flickr for a full-size view, you will find visible noise and loss of detail, which is owed to a large amount of analog and digital image data amplification.

Let’s add another example: One of the following images was shot with Extended ISO 12800, the other with ISO 6400 RAW and then pushed 1 EV in the internal RAW converter of my X-E1. Both images were shot at f5.6 and 1/30s in manual mode.

It’s hard to tell which one is which, isn’t it? With higher magnification levels or in a 100% view, you would see differences related to noise reduction. The camera is of course optimizing its noise reduction for its Extended ISO settings 12800 and 25600. On the other hand, pushing an ISO 6400 image in the internal converter will leave you with NR processing optimized for ISO 6400.

By the way, here’s the ISO 6400 RAW developed and pushed by 1 EV with Silkypix 5:

Why ISO 100 is not good for you

The Extended ISO range also includes the option of shooting at ISO 100, which is again only available if you are shooting exclusively in JPEGs. Here the process is inverted: the camera captures an image at its native ISO 200 and overexposes the RAW data by one exposure value (1 EV) in the process. Then, during the RAW conversion, it brings the exposure down again by 1 EV. This process—the counterpart of “pushing” an exposure—is called pull development.

This method produces images with good contrast, very little noise and a high degree of detail, particularly in the shadow areas, which comes at the expense of the high end of the dynamic range. The highlights, or bright tones, suffer dramatically, making ISO 100 also an “emergency setting” for images that don’t feature high contrast or important highlight details.

Again, you can manually simulate Extended ISO 100 by enabling RAW, shooting in native ISO 200 and overexposing your image by 1 EV while doing so. When you process this image in the camera’s internal or with an external RAW converter, you have to correct for this by using the Pull option or the exposure slider.

Does this process sound familiar? It’s indeed pretty much the same as using classical ETTR aka classical Expose To The Right. In Extended ISO 100, the camera works the entire process (shooting the image overexposed and developing it underexposed) automatically. However, Extended ISO 100 will only get you JPEGs, no RAW files. And it only makes sense with subjects that exhibit low dynamic range, as this method tends to blow the highlights of your subject.

Have a look at this example (click on the images for high-res versions):

ISO 200

The image above shows our test subject in standard ISO 200. The full dynamic range is preserved.

ISO 100

This example shows the same image in Extended ISO 100. As you can see, it shows more contrast and highlights are blown.

To illustrate the difference more clearly, here are both images in Apple Aperture. The red areas show exposure warnings indicating blown (missing) highlights:

ISO 200 - Highlights Clipping Warning

ISO 100 - Highlights Clipping Warning

As you can see, there’s a very visible difference between ISO 200 (above) and Extended ISO 100 (below).

Let’s summarize: We should only stray beyond the standard range of ISO 200-6400 when there’s no other option. Extended ISO 100 results in a reduced dynamic range for highlights, whereas ISO 12800 and ISO 25600 lead to very visible interference and a loss of detail. Moreover, these three “extended ISO range” settings are available only when your camera is set to save JPEGs only—writing RAW files with these settings is not an option.

Here’s the poll for next week’s column. With Extended ISO gone and little interest in tips for updating the camera and lens firmware, let’s add two new options:

FujiRumors should....

View Results

Loading ... Loading ...

Till next week!

Rico Pfirstinger studied communications and has been working as journalist, publicist, and photographer since the mid-80s. He has written a number of books on topics as diverse as Adobe PageMaker and sled dogs, and produced a beautiful book of photographs titled Huskies in Action (German version). He has spent time working as the head of a department with the German Burda-Publishing Company and served as chief editor for a winter sports website. After eight years as a freelance film critic and entertainment writer in Los Angeles, Rico now lives in Germany and devotes his time to digital photography and compact camera systems. His book “Mastering the FUJIFILM X-Pro1” (Kindle Edition) (Apple iBook Store) (German version) is available on Amazon.

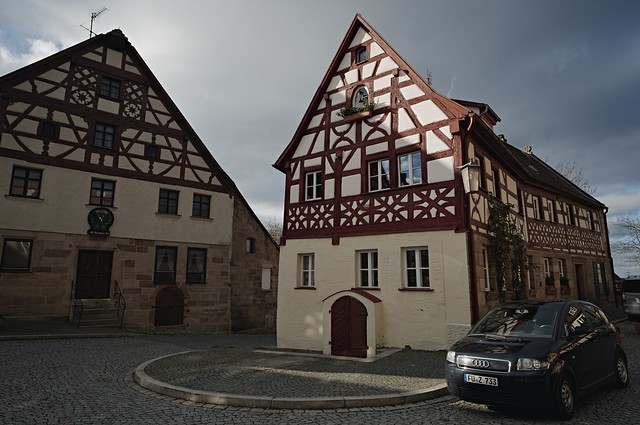
EXR, anyone?

by Rico Pfirstinger

Hello and Happy New Year!

While the topic of Friday’s column appears to be set in stone by now (I have already uploaded several samples on “extended ISO settings” to my Flickr Photostream), I’d like to know about your interest in a different subject matter: EXR sensors. Plenty of Fujifilm cameras are using them, including three X-series models: X10, X-S1 and XF1.

To be clear: This is not about “EXR Auto” mode, which is basically kind of a “dummy mode” where the camera automatically decides which scene program to choose and what settings to establish, so the only thing the user has to do is press the shutter button. Nope, it’s about EXR DR and EXR SN: how it works, what it means (practically!), how to use it, when to use it, and when not to use it. Plus, how does your EXR camera actually use EXR? Do you really know? Do you even care to know?

Having spent several years with at least five different EXR camera models, I may have gathered some knowledge and experience that could be instrumental in answering some of these questions. I had to do it all by means of “reverse engineering”, as Fujifilm doesn’t disclose any kind of useful technical information about the inner workings of the EXR camera logic. So the question is: Do you want to know (more) about EXR?

Kindly answer the poll below:

Do you agree with the position of Fuji about IBIS?

View Results

Loading ... Loading ...

Rico Pfirstinger studied communications and has been working as journalist, publicist, and photographer since the mid-80s. He has written a number of books on topics as diverse as Adobe PageMaker and sled dogs, and produced a beautiful book of photographs titled Huskies in Action (german version). He has spent time working as the head of a department with the German Burda-Publishing Company and served as chief editor for a winter sports website. After eight years as a freelance film critic and entertainment writer in Los Angeles, Rico now lives in Germany and devotes his time to digital photography and compact camera systems. His book “Mastering the FUJIFILM X-Pro1” is available on Amazon.
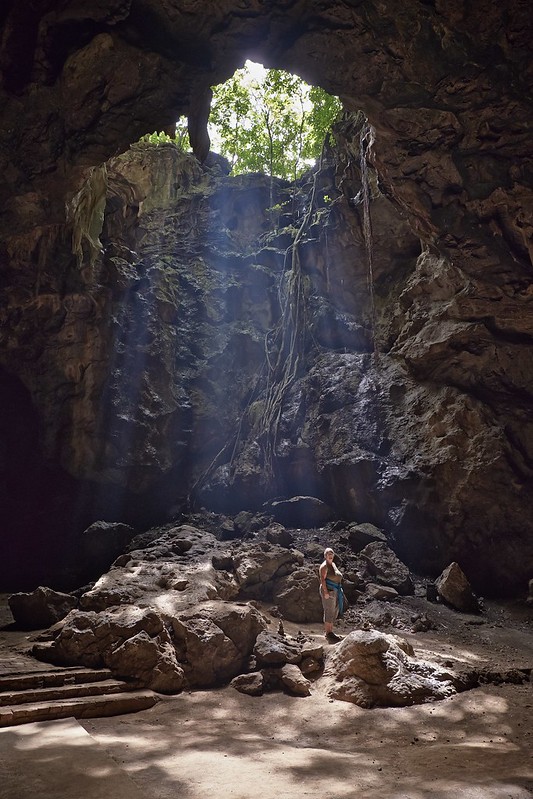
Capture One – When the Going Gets Tough…

…the Tough Get Going. Demosaicing the X-Trans sensor is a tough task, and in about a week, Phase One is expected to release a new final version of their successful Capture One (aka C1) RAW file processing software. Although it’s just a minor update (7.0.2) on paper, this is major news for Fujifilm X-Trans camera users. There’s also a crazy amount of hype  going on about it in the virtual sphere. Several beta testers have been stating that C1 is putting Lightroom/ACR to shame. This usually refers to X-Trans image detail reproduction, which is pretty lame in Lightroom. So this is a no-brainer: Of course, detail rendering is better than in Lightroom! DCRAW and Silkypix put Lightroom/ACR to shame in this category, as well.

That said, I think detail rendering is pretty decent in this C1 beta, but it’s also nothing to brag about too loudly (at least if you know how to use Silkypix 5 or the DCRAW based “RPP” converter). In any case, it’s always great to get new workflow options, because competition is good for us customers. I’m also confident that Phase One’s X-Trans market entry and increasing sales of current and future X-Trans camera models will put more pressure on Adobe to get their act together. Not that I really needed Lightroom, as I appear to be one of those very few human beings on this planet who have no problem at all processing X-Trans RAWs in (gasp!) Silkypix 5.

I have played with C1’s beta version for almost two weeks, and I’m quite pleased with its ability to recover highlights, which seems to be on par with Lightroom/ACR and definitely better than Silkypix 5. There are still several issues, though, which I will not get into specifically at this time, as I expect them to be ironed out in the final version of the software. It’s called “beta” for a reason, at least hopefully so.

Here are a few successful examples of me developing some of my high dynamic range test samples  in Capture One (click on them for high-res versions):

DSCF6339 (Capture One version)

DSCF5915 (Capture One version)

DSCF5528 - A Storm is Coming (Capture One version)

Please let me take this opportunity to thank you all for your warm welcome here on Fujirumors – and for so many of you also expressing their support by pre-ordering “Mastering the Fujifilm X-Pro1“, which will start shipping in just a few days, as my publisher has told me.

With respect to the topic of my next regular column, it appears like we already have a winner. However, please still cast your vote if you haven’t done so already. Your votes are not just helpful in determining what topics to discuss in future editions of this column, their accumulated number is also a good indicator of your general interest in this column altogether. That said, I’m already mentally preparing to write something insightful about “extended ISO” settings. See you next Friday here on Fujirumors, and have a great start in 2013!

The Best Locations for Streetphotography are... (max. 2 selections)

View Results

Loading ... Loading ...

Rico Pfirstinger studied communications and has been working as journalist, publicist, and photographer since the mid-80s. He has written a number of books on topics as diverse as Adobe PageMaker and sled dogs, and produced a beautiful book of photographs titled Huskies in Action (german version). He has spent time working as the head of a department with the German Burda-Publishing Company and served as chief editor for a winter sports website. After eight years as a freelance film critic and entertainment writer in Los Angeles, Rico now lives in Germany and devotes his time to digital photography and compact camera systems.